Anvil Covers Installation and Removal Guide
About C.U.E. Anvil Covers
The installation and rotation of a Timesaver anvil cover is a relatively easy and quick process. Care and compliance to the instructions are necessary to ensure your safety and to ensure the proper performance of the anvil cover. This document is available as a PDF download, check the links at the left hand side of the screen. If you have additional questions about the installation or rotation process please contact your distributor or click here to contact C.U.E.
Tools required for installation and Rotation
 - 3 Pound Dead-Blow Urethane Hammer
- C.U.E. Part No. Q1001- - T-Handle Allen Wrench
- Size depends on bolt - - C.U.E. Pry Bar Tool
- C.U.E. Part No. Q1000 -
 IMPORTANT ! TIMESAVER rotary die blankets are made to precise dimensions for a tight fit. Please remove any debris from the cylinder and keyway before beginning installation. Also make sure both the keyway and cylinder are free of burrs. Burrs, especially in the keyway can cause difficulty installing the TIMESAVER. Burrs can quickly be removed with a file.
|
||||||||
 |
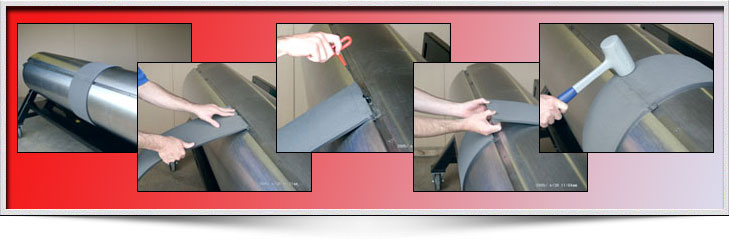
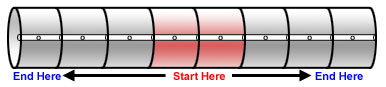
Always begin installation of the first TIMESAVER blankets at the center of the anvil cylinder. |
|||||||
 |
Step 1: |
|||||||
 |
Note:
|
|||||||
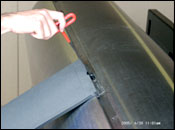 |
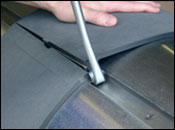
Hand-tighten with an Allen T-wrench. |
|||||||
 |
Step 2: |
|||||||
 |
Step 3: |
|||||||
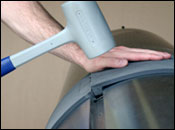 |
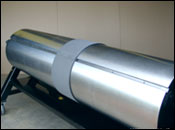
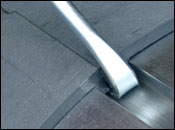
Important: Press lock bar end into keyway before striking it with dead-blow hammer. |
|||||||
 |
The first hammer blow should be delivered as pictured above, roughly 3 inches from the edge and just above the seam, with force. |
|||||||
 |
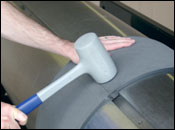
The second hammer blow should be delivered as pictured above, roughly in the center just above the seam. |
|||||||
 |
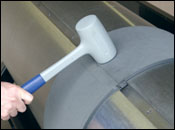
The final hammer blow should be delivered near the edge of the cover, just above the seam. |
|||||||
Removal Process | \
||||||||
 |
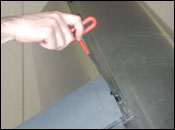
Step 1: |
|||||||
 |
|
|||||||
 |
|
|||||||
For more information about C.U.E.'s Anvil cover products call 800-283-4621 or click here to contact us.